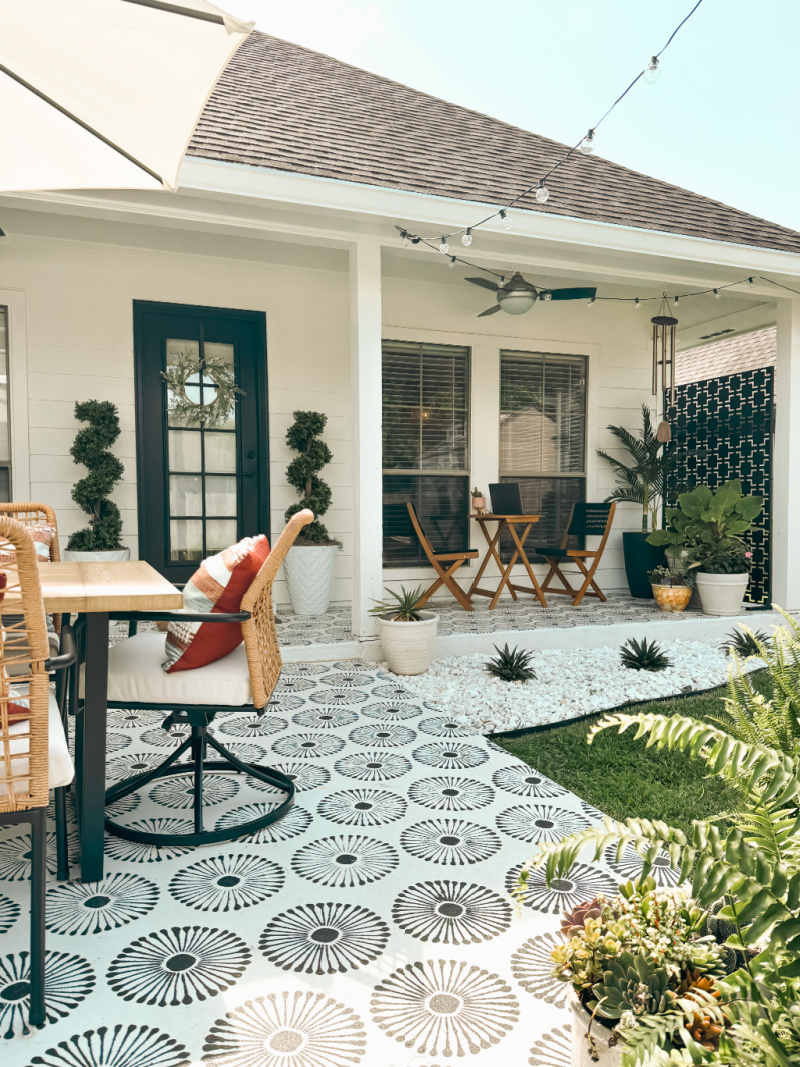
We spent a few weeks this spring working on updating our backyard patio space and I could not be happier with how it’s turned out.
I find myself spending a lot of my time now either napping out on the hammock or set up at my little bistro table space with my laptop out here. It gives that upscale beachy feel that I’ve always longed for and find motivating as an outdoor work space.
All that to say…I’m so happy we did it!
Backyard Patio Makeover
| shop the post |
Tips for Painting Your Outdoor Concrete Space
While I wouldn’t say this project gave us any major issues, we did have a few learning curves to deal with when it came to painting and stenciling the concrete. So I’m sharing a couple of tips and how-to’s that hopefully makes the project smooth sailing if you decide to try it for yourself.
1. Choose your stenciling brushes wisely
I went through several versions of brushes before I settled on one that gave the best results. My suggestion is to go with a very firm bristle small round brush. We tried a small roller brush but the paint bleed was bad. Definitely don’t recommend.
It’s also worth letting you in on the old 1980’s “pounce” method of painting with stencils if you didn’t do those kinds of crafty projects when you were a kid. So instead of a typical brush stroke, you want to “pounce” with an up and down motion instead. And the less paint on your brush, the better.
Depending on the size of your outdoor space, it could take a good amount of time. I suggest doing it in multiple sessions on days with good weather. I did it on our beautiful spring days with my music turned on, so it was a fun and somewhat relaxing experience to me. And honestly, it’s so gratifying to watch your space come to life with each lifting of the painted stencil.
Several stencil pattern options:


2. Choose a high grade concrete paint
When it comes to important painting projects that are going to get a lot of foot traffic, I’d opt for a higher grade concrete paint product. Just to give you an idea of how much paint you might need, for our space we used two gallons of the white and then only about 3/4 of a gallon of the black for the stenciling portion of the project. We went with the H & C Colortop Concrete Stain in white.

3. To Clear Coat or not to Clear Coat
Depending on the long term look you’re going for, you can opt to seal your finished project with a clear coat or leave it as is. If you want it to remain looking exactly as you painted it, definitely apply a nice thick coat of a sealer. But if you’re hoping for a more weathered, lived-in look to develop over time, then you can skip the clear coat. Also, just to let you know, concrete sealers come in natural finish or a wet look/high shine finish. It’s completely up to you. We opted for a natural clear coat and used the H & C Clarishield Clear Concrete sealer.


I hope those few tips and ideas were helpful for you. If you tackle this project, I hope you get as much enjoyment out of your freshly painted space as we have with ours!


*Post contains affiliate links. This means that I will make a small commission if you purchase through these links. I only feature products and brands on my site that I truly love and use. Please know that this does not increase the product price for you as the consumer. Thank you for supporting this blog and the brands that make it possible.
